

Welcome to Rory's novice guide to brewing a cup of coffee that is perfect for you, using an espresso machine.
DISCLAIMER
I am lucky enough to have spent a lot of time with Zach, the owner at Chipp Coffee, who has taught me an enormous amount about everything to do with coffee. I may know more than the average bear but I am by no means a coffee expert. This guide is aimed to help you brew a cup of coffee that is right for you. You might see things here that make you think, ‘What the heck is this guy doing?’, but this is how I make the coffee I like.
Getting Started with Coffee
To get the most out of your morning brew you first need to understand the different types of coffee including regional variations and different roast profiles. You can learn all about different regions and strength profiles through trying coffee yourself. These groups and flavour notes are not exclusive to themselves and there is a lot of crossover but this is a good place to start.
Regional Profiles
1. Latin America
- Chocolate
- Nutty
- Caramel
2. Africa
- Fruity
- Floral
- Sweet
3. Asia
- Dark Chocolate
- Earthy
- Herbal
In addition to these flavour profiles, there are many other tasting notes to consider such as dryness or juiciness, acidity, bitterness. Some more unique flavour notes can also be described as paper-like, smoky or even medicinal but understanding these comes with trying as many different varieties as you can get your hands on.
Roast Profiles
Coffee generally comes in three roast profiles – light, medium and dark – each their own distinct flavour notes. Generally, the darker the roast the more pungent and intense the coffee notes become and the less sweetness your coffee will have. However, this isn’t a golden rule for all coffees and the more you try the more you will get a feel for what you like. I personally prefer a light or medium roast coffee because I enjoy the fruity sweetness these coffees usually provide.
Calderon - Washed Geisha Coffee
Chipp Coffee was lovely enough to send me an absolutely incredible Washed Geisha variety from Colombia. This is one of the most unique flavour profiles I’ve experienced on my own personal coffee journey.
Washed Geisha Flavour Profile
It's fruity and juicy with sweet notes that make it almost more like a tea than a coffee and I would highly recommend this if you're feeling fancy. There are also a wide variety of different brewing methods out there. I have personally only tried a few and found that these work great for me in any coffee situation I find myself in.

Brewing Methods
There are three different brewing methods:
1. Using an espresso machine
2. Using a percolator
3. Using a cafetiere
Each of these methods have pros and cons. Ultimately, it all comes down to the coffee itself and the care you take when making it so try them all out and see which you prefer. This
Using an Espresso Machine
I was lucky enough to receive a Sage Espresso Machine as a gift and this has become my daily brewing method for nearly all my coffee needs.

Pros
The main pros of using this machine is it helps to get a really consistent cup of coffee every single time, because the machine does most of the work for you. The settings, once you’ve dialled them in how you like it, will stay the same and provide the same great tasting cup every single time.
For those that don’t know, an espresso machine works by grinding the beans to your desired consistency, packing them tightly into a portafilter. It then applies a high amount of water pressure into the coffee, to produce an intense tasting small amount of coffee. This can either be drunk as is or can be mixed with water or milk to create various different coffees such as a latte or flat white.
Cons
Now the downside to these machines is that you can only make one cup at a time so if you’re brewing for a group and they don’t want to wait you’re probably better off with something like a cafetiere for speed.
You may also have to play around with the various settings during the initial set up, which some people might find tricky.
Setting up an Espresso Machine
The main parts of the machine you need to consider when setting it up and dialling in your coffee are – the grind size, the grind amount, the filter size and ensuring the coffee is correctly prepared in the portafilter so let’s get started.
For espresso you typically want a finer ground coffee. This can fluctuate between blends and roast profiles but generally you want a fine ground coffee for this as it will retain more water pressure during the brewing process.
I have my machine set to a 3/10 with 1 being the finest and 10 being the coarsest. Going too fine in your grind can result in too much pressure and the coffee not being properly extracted resulting in a bitter thick syrup rather than a well-balanced brew. Take the time to make sure this step is correct otherwise you’re going to have a bad time with everything else.

Once you have your grind profile set correctly the next thing to consider is the amount of coffee you grind each time. This has a huge impact on the water pressure that builds up during the brewing process and ultimately affects the taste of your coffee. You want enough coffee in your filter that when ground it creates a little mound on the top which is higher than the lip of your filter. This is because you are going to push this down to create a puck. 
Leveling & Tamping Coffee
This next step is optional, but I do find it helps with the brewing to create more consistency.

Take your coffee leveler (the big heavy round weight) and pop it on top of your espresso ground to flatten them down. Then, rotate the leveler to evenly spread your coffee out in the filter basket.

The final step before brewing is called tamping. This is where you use a tamper to press the coffee down and create the dense puck you need for espresso. When compressed your tamper should sit just within your basket nice and flat to provide a good surface for the water.

Once you're happy with these steps, place and lock your coffee filter into the brew head (the part where the coffee comes out) and make sure it’s locked in tight.
Time to Brew
Now we’re at the part where the magic happens and if you have prepared your coffee correctly the bus should basically drive itself at this point. Place your cup under the filter and press the button for the desired number of shots of espresso. Most machines come with a single and double shot option, I personally always do a double shot, because more coffee = happier me.
This is the point where you will know if your hard work has paid off. Press the button for your desired number of shots and pay attention to the pressure gauge on your machine. Most machines will tell you the ideal pressure level you’re looking for so take note of what you’re aiming for on your personal machine. If you’ve prepped your coffee correctly you’ll see the pressure go up to the desired ideal range and the coffee will pass through the filter into your cup.
Taste Preference
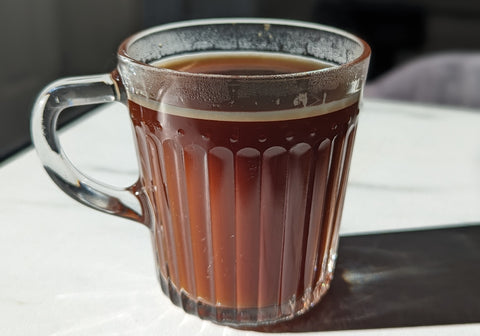
I personally drink my coffee black, so I will just top off my cup with some water from the kettle.
At this point feel free to add your milk or any other extras you want in your cup and you're good to go.
As I’ve said earlier this is about creating the cup you want to drink, there is no right or wrong way in which coffee should be drunk. As long as you’re happy and getting the best out of your beans and machine.
You'll notice that as the coffee cools the flavour profile will also change. I usually leave my coffee between 5 and 10 minutes before I drink just to let all the flavours get to know each other and settle down.
You’ve just made the best damn cup of coffee you’ve had in your life and you did it all by yourself. Starbucks eat your heart out!

Troubleshooting
- If the pressure is too low, you need more coffee, a finer ground or a combination of the two
- If the pressure in your machine is too high you need the opposite but this is all about experimentation
- Be prepared to have a few cups of coffee that aren’t quite what you’re looking for until you get your preferred settings